Hey there, if you’re in packaging, you know shrink sleeve labeling is that game-changer for brands—kills boring boxy labels, gives seamless 360° coverage, and lets you slap on all that cool product art. But let’s be real, nothing’s more frustrating than slow labeling lines, wrinkled sleeves, or wasting half a roll because something’s off. As a shrink sleeve labeling supplier who’s actually deep in the trenches with clients daily, I’ve picked up more hacks than I can count on fixing this stuff. Let’s dive in the real, no-BS ways to boost your shrink sleeve efficiency—stuff that works, not just textbook fluff. Shrink Sleeve Labeling

First up, let’s talk prep. I see so many brands skip the basic checks here and end up paying for it later. Your sleeve specs matter way more than you think. I once worked with a craft soda company that was buying generic PET sleeves (their first mistake!) and trying to stretch them 15% past their designed size to fit their bottles. The machine couldn’t keep up—weird wrinkling, random sleeves tearing mid-apply, and they were throwing away 20% of their run. That’s not just waste; that’s lost time and cash. Here’s the thing: every shrink sleeve is made for a specific material (PET, PVC, PLA, even those eco-friendly bioplastics popping up now) and a specific bottle diameter/height. Don’t eyeball it. When you order sleeves from us, give your exact bottle dimensions—including the curve of the neck, not just the straight part. And if you’re using a PLA sleeve (super hot for sustainable brands right now), note that it’s way more sensitive to heat than PVC. Prep that info before you run a batch, not when your line’s already down.
Then there’s the equipment setup. A lot of guys treat their shrink sleeve machines like “set it and forget it” and move on to the next job. Big mistake. Let’s break this down: first, the cutting unit. If your rotary cutters are dull, you’ll get crooked sleeve ends, which means they don’t slide onto bottles right. We do free minor blade sharpening for our regular clients, and I can’t tell you how many times that single tweak fixed a 10% speed drop. Next, the applicator’s mandrel (that metal part that pulls the sleeves off the roll and onto the bottle). If the mandrel’s dirty or has burrs, sleeves catch and tear. We recommend wiping it down with isopropyl alcohol every 8 hours of run time—super quick, takes 2 minutes, and saves you 10 minutes of downtime fixing a jam.
Heating’s the next big one. Too much heat and the sleeve shrinks too fast, causing wrinkles around bottle curves. Too little, and it’s loose, which will blow off on the shelf. I’ve seen clients mess this up by cranking the heat way up to speed through runs, but here’s the science bit: heat distribution is key. Conveyors that let the sleeve move evenly through the heat tunnel, not just bump along, work way better. If your tunnel has hot spots (most old machines do), use temperature mapping—stick a few temperature strips along the conveyor, from start to finish. We always tell our clients to target 180-200°F for PET sleeves, 160-180°F for PLA. And don’t forget the exhaust! If the tunnel’s full of excess moisture or fumes, the heat doesn’t circulate right. Clean the exhaust filters every 12 hours—another tiny step that makes a huge difference.
Now, let’s talk about material-handling hacks for sleeves. Even the best machine won’t help if you’re storing sleeves wrong. I had a snack brand once that kept their sleeve rolls in a cold, damp warehouse—by the time they ran them, the sleeves were warped. When we tested them, the shrink ratio was off by 3%, and they were having 15 jams a day. Sleeves are mostly plastic, so they’re sensitive to humidity and extreme temps. Store them between 60-75°F and 40-50% humidity. If you’re in a super dry climate, spritz the warehouse shelves with a tiny bit of water before stacking rolls—no exaggeration, that fixed their jam issue overnight. Also, never stack more than 3 rolls high. The weight at the bottom can crush the roll core, making the sleeves bunch up when you load them into the machine. We ship our sleeves in reinforced boxes with dividers specifically for this, so you don’t have to worry about it, but if you’re storing them after delivery, don’t stack ’em like firewood.
Speed is the big goal, but rushing it will kill you. I see clients trying to push their line 20% faster than the machine’s rated speed, and it always backfires. If your machine is rated for 60 bottles a minute, don’t try to hit 75. Why? The applicator can’t grab the sleeve fast enough, and the conveyor can’t sync right. But here’s a trick: if you upgrade to a servo-driven applicator (we sell these, but let’s be real, even a small upgrade makes a difference), you can bump speed by 15% without issues. Servo controls sync the sleeve feed perfectly with the bottle rotation, no more missed sleeves. We had a personal care brand switch from a pneumatic applicator to a basic servo model, and their line went from 45 bottles/min to 55—no extra downtime, just pure efficiency.
Another thing: downtime for changeovers. When you’re switching between a soda bottle and a shampoo bottle, you don’t want to spend 45 minutes reconfiguring everything. Prep changeover parts ahead of time. Have separate mandrels, cutter blades, and heat tunnel settings pre-labeled for each product. We give our clients a free “changeover kit” sticker set so they can mark every part, which cuts their changeover time by half. One of our client’s line managers told me this was the single biggest win for them—they used to waste 2 hours on changeovers, now it’s 45 minutes, and they get 10 more runs a month out of the same equipment.
Wait, let’s not forget quality checks. A lot of brands only check at the end of the line, but if you catch a bad sleeve mid-run, you can fix it fast. We suggest putting a tiny inspection station right after the applicator—just a person with a flashlight, checking for crooked sleeves, tears, or misaligned print. If a bad sleeve gets all the way to the heat tunnel, you have to stop the line, pull a bunch of bottles, and clean the tunnel. Catching 1 bad sleeve in the first 100 saves you from having to fix 1,000 later. One client installed a basic camera check (we work with third-party providers for this) and eliminated all post-run rejects—their waste went from 8% to 1%, that’s thousands of dollars a month saved.
Also, maintenance can’t be an afterthought. I know, machines are a pain to service, but skipping it means more breakdowns. Schedule a monthly check of your machine’s belts, gears, and motors. If belts are loose, the line slows down. If gears are worn, you get uneven sleeve feeding. We offer on-site maintenance calls, but even a 10-minute check every few days will catch small issues before they become big ones. One beer client used to ignore maintenance, and their machine broke down every other week—after we did a full tune-up, breakdowns went to once a month, and their efficiency jumped 20%.
Now, let’s talk sleeve-specific tweaks you might not know. If you’re using high-shrink sleeves (for that super tight, “second skin” look), make sure your heat tunnel has a cooling section after. If it’s too hot when the sleeve comes out, it can stretch back, or even stick to the conveyor. A 10-foot cooling zone with fans fixes that, so you don’t have rejects because the sleeve is loose after packaging. Also, for neck bands—those little shrink sleeves around bottle necks for tamper evidence—adjust the applicator’s angle. A lot of guys use the same angle for full sleeves and neck bands, but neck bands need a steeper angle to slide on without bunching. We give custom angle guides with our neck band sleeves, so clients don’t have to guess.
Wait, let’s address the elephant in the room: eco-friendly sleeves. A lot of brands switching to PLA or recycled PET are running into new efficiency issues because they’re different from traditional PVC. PLA shrinks at a lower temp, so you can’t use the same heat settings. Recycled PET can be a bit more rigid, so you need a slightly larger mandrel to make it slide on easier. We test every eco sleeve formula we make before sending it to clients, and give them a custom setup guide, which cuts their learning curve from 2 weeks to 2 days. One of our plant-based food clients was struggling with PLA sleeves, and we adjusted their heat tunnel temp and mandrel size, and their jams went from 12 a day to zero.
Let me wrap this up with a quick recap so you don’t forget anything: prep sleeve specs correctly, keep equipment sharp and clean, nail your heat settings, store sleeves right, don’t rush speed, prep changeovers ahead, catch issues early with small checks, schedule regular maintenance, and tweak for eco sleeves if you’re using ’em. All these little things add up to way less downtime, less waste, and more bottles per hour.
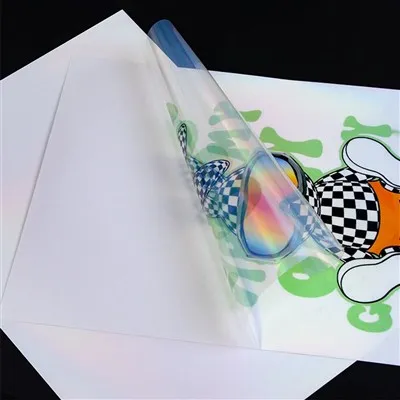
If you’re tired of shrink sleeve headaches and want to get your line running at peak efficiency, hit us up to talk through your setup. We don’t do generic advice—we work with you to figure out what’s off for your specific bottles, machines, and products, no fluff, no pressure.
Self-adhesive Printing Paper References
Shrink Sleeve Labeling: A Guide to Efficiency and Quality. Packaging World Magazine. 2023.
PLA Shrink Sleeve Performance for Sustainable Packaging. Journal of Flexible Packaging. 2022.
Machinery Maintenance Best Practices for Packaging Lines. Industrial Packaging Association. 2021.
Nanjing Green Label Printing Co., Ltd.
We are one of the most professional shrink sleeve labeling manufacturers and suppliers in China, also support customized service. We warmly welcome you to wholesale high quality shrink sleeve labeling at competitive price from our factory. For pricelist and quotation, contact us now.
Address: No. 116-3 Suyuan Avenue, Jiangning District, Nanjing
E-mail: greenlabel@126.com
WebSite: https://www.chinalabelprint.com/
